NFS is a distributed file system protocol that allows clients to access files over a network as if they were local. It is commonly used for sharing files between servers and clients in a networked environment.
In this article, we will install and configure an NFS server in a VM running Debian GNU/Linux on a Proxmox VE cluster, optionally using our ZFS pool on HDD disks. The NFS server will be used to share files between multiple clients, such as web or application servers.
This is an alternative approach to using an S3 compatible object storage, such as MinIO, Garage or SeaweedFS. Both approaches have their own advantages and disadvantages, and the choice between them depends on the specific use case, requirements and limitations.
ISO download #
Visit the Downloading Debian page and its linked SHA512SUMS page. You are for looking for latest Debian 12 Bookworm Netinst ISO and its SHA-512 checksum.
Click on the node where you want to install the VM, go to the local storage, go to the ISO Images menu option and click the Download from URL button:
- Paste the URL of the latest Debian 12 Bookworm Netinst ISO into the
URLfield and click onQuery URL.File sizeandMIME typewill be filled in. - Select the hash algorithm
SHA-512and paste the checksum for the image.
The image will be downloaded and verified. Once the download is complete, you will notice the ISO image in the local storage on the node.
Alternatively, if you want to use the terminal, these are the commands you have to execute at the node where you will be installing the VM:
wget https://cdimage.debian.org/debian-cd/current/amd64/iso-cd/debian-12.11.0-amd64-netinst.iso \
     --output-document=/var/lib/vz/template/iso/debian-12.11.0-amd64-netinst.iso
For security, calculate its SHA 512 checksum and compare it with the one from the SHA512SUMS file:
sha512sum /var/lib/vz/template/iso/debian-12.11.0-amd64-netinst.iso
wget https://cdimage.debian.org/debian-cd/current/amd64/iso-cd/SHA512SUMS -O- | grep debian-12.11.0-amd64-netinst.iso
VM creation #
We will be using three separate virtual disks for the VM:
- OS disk: A small disk on our local pool that will hold the operating system.
- Swap disk: A small disk on our local pool that will hold the swap space.
- Data disk: A larger disk on our ZFS pool that will hold the data to be shared via NFS.
This is to simplify the setup and prevent us from running into issues with disk space management on multiple partitions. The OS disk will be formatted using EXT4 and the data disk will be formatted using XFS, which will allow us to extend them later, if needed.
Therefore, we will be using manual partitioning during the OS installation to create a DOS partition table and a primary partition on the OS and swap disks.
Using the GUI #
Select the node where you want to install the VM on, then click on the Create VM button on the top-right corner of the Proxmox VE WebGUI and follow the assistant.
| Tab | Attribute | Value | Note |
|---|---|---|---|
| General | Name | nfs1 |
Usually, but not necessarily, its hostname |
| General | Resource pool | databases |
Logical group of guests of your choice 1 |
| General | Start at boot | No | Will be switched to Yes once we are done |
| OS | Storage | local |
|
| OS | ISO image | debian-12.11.0-amd64-netinst |
|
| System | Processor type | host |
To benefit from AES-NI, AVX, SSE4.2, etc. |
| System | Graphic card | Default | |
| System | Machine | Default (i440fx) | |
| System | BIOS | Default (SeaBIOS) | |
| System | SCSI controller | VirtIO SCSI single | Match with IO thread for performance 2 |
| System | Qemu agent | Yes | |
| CPU | Cores | 4 | Moderate concurrency |
| Memory | Memory (MiB) | 8192 | Moderate usage, matches ZFS ARC config |
| Memory | Min. memory (MiB) | 4096 | Moderate usage, matches ZFS ARC config |
| Memory | Ballooning device | Yes | Dynamically adjust the VM’s memorory usage |
| Network | Bridge | vmbr4002 |
Proxmox guests private network |
| Network | Model | VirtIO (paravirtualized) | Best performance and low overhead for Linux |
| Network | MTU | 1400 | Matches the Proxmox host network MTU |
Using processor type
hostexposes modern CPU features such as AVX, AVX2, SSE4.2, BMI1/BMI2, and FMA. We trade better performance and compatibility with modern software for less portability, i.e., VM live migration between nodes may fail when using very different CPU architectures.
On the Disks tab, we will be creating three disks, as described above. Use the Add button on the bottom-left corner to add disks.
| Option | OS disk | Swap disk | Data disk | Notes |
|---|---|---|---|---|
Bus/Device |
SCSI 0 |
SCSI 1 |
SCSI 2 |
VirtIO SCSI driver works well with discard |
Storage |
local |
local |
zfspool |
|
Disk size (GiB) |
3 | 1 | 100 | |
Format |
qcow2 |
raw |
raw |
Snapshots enabled |
Cache |
No cache | No cache | No cache | Avoid double caching with ZFS |
IO thread |
Yes | No | Yes | Parallel NFS access |
Backup |
Yes | No | Yes | Include disk in backup jobs |
Async IO |
io_uring |
io_uring |
io_uring |
Most compatible and reliable |
Discard |
Yes | Yes | Yes | Enable TRIM/UNMAP |
Regarding the data disk, by choosing
zfspoolas storage, the assistant creates a ZFS volume (ZVOL) instead of a virtual disk.
Incidentally, in the node where this VM is being provisioned we have allocated 4-8 GB for ZFS ARC via /etc/modprobe.d/zfs.conf:
options zfs zfs_arc_max=8589934592
options zfs zfs_arc_min=4294967296
This will allow the VM to use up to 8 GB of memory for caching, which is a good amount for a moderate usage NFS server. The Min. memory setting will ensure that the VM has at least 4 GB of memory available, which is enough for the OS and the NFS server.
The VM id will be automatically assigned by Proxmox, but you can change it to a specific number if you want. In this article, we will use 104 as the VM id.
Do not forget to add the corresponding DNS records to your internal zone
localdomain.comand to your reverse zone168.192.in-addr.arpa.
Using the CLI #
Alternatively, if you prefer using the terminal, follow these three steps to achieve the same results.
Just in case it has not been done before, create the resource pool of your liking:
pvesh create /pools --poolid databases --comment "Database and file storage servers"If the pool already exists, the command will fail but do no harm.
Let’s start by creating the VM:
qm create 104 --name nfs1 --cores 4 --cpu host \
   --balloon 4096 --memory 8192 \
   --net0 virtio,bridge=vmbr4002,firewall=1,mtu=1400 \
   --scsihw virtio-scsi-single \
   --ostype l26 --bios seabios \
   --agent enabled=1,fstrim_cloned_disks=1,type=virtio \
   --ide2 local:iso/debian-12.11.0-amd64-netinst.iso,media=cdrom \
   --pool databases --description "NFS server" --onboot 0
Then, create and attach the OS, swap and data disks:
qm set 104 --scsi0 local:3,format=qcow2,iothread=1,discard=on,serial=os
qm set 104 --scsi1 local:1,format=raw,discard=on,backup=0,serial=swap
qm set 104 --scsi2 zfspool:100,format=raw,iothread=1,discard=on,serial=data
We are using the special syntax
STORAGE_ID:SIZE_IN_GiBto allocate a new volume.
Proxmox names disks using the template vm-<vmid>-disk-<diskid>, where <diskid> is a zero-based index, per VM and storage. Therefore, disks will be named local:104/vm-104-disk-0.qcow2, local:104/vm-104-disk-1.raw and zfspool:vm-104-disk-0, respectively. We are using the serial option to make it easier to identify the disks later.
Finally, configure the boot order:
qm set 104 --boot order=scsi0Optionally, check the block size volblocksize of our ZVOL:
zfs get volblocksize zfspool/vm-104-disk-0Optionally, verify the configuration:
qm config 104ZFS volumes #
ZFS volumes (ZVOLs) are an alternative to traditional virtual disks for VM data storage in Proxmox. While the Proxmox VM creation wizard typically provisions disk images in formats like qcow2 (QEMU Copy On Write) or raw, these are still files sitting atop a filesystem. By contrast, ZVOLs offer native block-level storage managed directly by ZFS, eliminating the file layer entirely. This provides performance benefits, block-level snapshots, and more seamless resizing that are particularly relevant when exporting data over NFS.
To clarify, ZVOLs do not provide “raw image format”, like /var/lib/vz/images/104/vm-104-disk-1.raw, but rather the disk is a ZFS-managed block device, such as /dev/zvol/zfspool/vm-104-disk-0 (actually, /dev/zd0), i.e., no file, no virtual layer. Therefore, with a ZVOL, you avoid writing to a file sitting inside a ZFS dataset3 and QEMU going through file I/O layers and, instead, you get a native block device backed directly by ZFS. This means better synchronisation and performance, especially for workloads that require frequent writes.
It is important to emphasise that we are not using ZFS as a filesystem inside the VM. Instead, we are using ZFS to back a block device and, inside the VM, we will format it using EXT4 or XFS.
In our scenario, we chose to use a ZVOL for the data disk when we chose zfspool as storage during the VM creation process, which will allow us to take advantage of features such as snapshots and compression. It will behave exactly like a physical disk: no filesystem or partition table until we create one. Inside the VM, the ZVOL will appear as a new physical disk (e.g., /dev/sdc), and it will be completely blank until we format it.
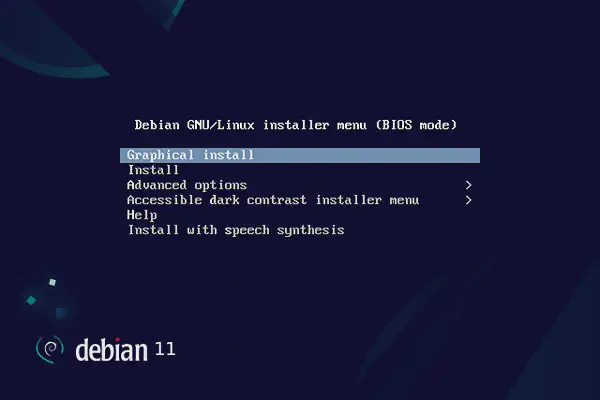
OS install #
Once the VM has been created, click on its Console menu option and click the Start button. Once booted, the graphical installer will appear. Select the second option, Install, to change into the text mode.
Proceed with the configuration of the language and keyboard layout. Example options:
- Language: English
- Location: Europe, Spain
- Locale: United States (
en_US.UTC-8) - Keymap: Spanish
Next, network configuration via DHCP auto configuration will be attempted. If you do not use HDCP, it will time out and display an error message. Select Continue and, in the next screen, select Configure network manually. Example options:
- IP address:
192.168.0.4/24 - Gateway:
- Name server addresses:
192.168.0.239 192.168.0.241 - Hostname:
nfs1 - Domain name:
localdomain.com - Root password:
- Full name for the new user: Systems Administrator
- Username for your account:
devops - Password for the new user:
- Time zone: Madrid
The guests in the cluster use an HTTP proxy to access the Debian package repositories, therefore the gateway is left blank.
Partitioning is next. Choose the “Manual” option and set up the OS and swap disks. Ignore the data disk for now.
First disk (OS):
- Select the
SCSI (0,0,0)disk (e.g.,sda). - Accept creating a new empty partition table on the device.
- Select the
pri/log free spaceUI placeholder showing the available unallocated space. - Select
Create a new partition. Use all available space (default option) and selectPrimaryas the partition type. - Set the following options:
- Use as:
Ext4 journaling file system. - Mount point:
/ - Mount options:
discard,noatime,nodiratime - Label:
os - Reserved blocks: 1%
- Typical usage:
standard - Bootable flag:
on
- Use as:
- Select
Done setting up the partition.
Second disk (swap):
- Select the
SCSI (0,0,1)disk (e.g.,sdb). - Accept creating a new empty partition table on the device.
- Select the
pri/log free spaceUI placeholder showing the available unallocated space. - Select
Create a new partition. Use all available space (default option) and selectPrimaryas the partition type. - Set the following options:
- Use as:
swap area. - Bootable flag:
off
- Use as:
- Select
Done setting up the partition.
Third disk (data):
- Ignore the third
SCSI (0,0,2)disk (e.g.,sdc) during the installation.
Select the Finish partitioning and write changes to disk option and accept writing the changes to disk. The installer will install the base system.
The correspondence between SCSI disks and the
/dev/sdXdevice names used above is not guaranteed. The installer will display the disk size, which can help you identify them.
The next step in the installer is to configure the package manager. When prompted Scan extra installation media?, select No. Then set the following options:
- Debian archive mirror country: Germany
- Debian archive mirror:
deb.debian.org - HTTP proxy information:
http://apt.localdomain.com:8080/
Proxy detection will be followed up by packages index update. Then, the installer will upgrade the base system with new packages, if any. Once complete, decide whether you want to participate in the package usage survey, then choose SSH server and Standard system utilities (default values) in the software selection screen, and continue.
The final step is to install the GRUB boot loader. Choose to install the GRUB boot loader to the primary drive /dev/sda (scsi-0QEMU_QEMU_HARDDISK_drive-scsi0). Once its installation is complete, choose Continue to reboot.
Use the WebGUI to stop the VM once it has rebooted, then visit the Options > Boot order menu option of the VM and make sure that the scsi0 disk is the first in the list and, optionally, the only one enabled. Then visit the Hardware > CD/DVD Drive (ide2) entry and select the Do not use any media option.
You can now start the VM.
OS configuration #
Some basic configuration of the OS.
Add your cluster public key to the ~/.ssh/authorized_keys file of the root user and check that you can connect from your Ansible Controller, through your bastion host, or equivalent.
Reduce swappiness to a minimum to save writes on the NVMe disk by setting vm.swappiness in the VM (swappiness is a kernel-level parameter controlled by the guest OS):
echo "vm.swappiness=1" | tee /etc/sysctl.d/99-swap.conf
sysctl --load=/etc/sysctl.d/99-swap.conf
Check that support for trimming is working:
fstrim --verbose /Neither the VMs nor the LXCs in our cluster have a gateway, so they use an APT proxy to update packages. The information we provided during OS installation was saved in the /etc/apt/apt.conf file by the installer. Either edit such file or create the file /etc/apt/apt.conf.d/00aptproxy and add support for HTTPS:
Acquire::http { Proxy "http://apt.localdomain.com:8080/"; };
Acquire::https { Proxy "http://apt.localdomain.com:8080/"; };
Some extra packages worth installing:
apt-get update
apt-get install --yes ccze dnsutils jq net-tools nmap rsync tcpdump
Configure the system hostname and related settings:
hostnamectl set-hostname nfs1
hostnamectl set-deployment staging
hostnamectl set-chassis "vm"
hostnamectl set-location "Data Center Park Helsinki, Finland"
Hetzner keeps a list of their data centres in their webpage.
Servers should always store UTC. Local time is a presentation layer issue that only humans need to see. You can check the time zone in your server using the timedatectl status command, then set the time zone to UTC, if needed:
timedatectl set-timezone Etc/UTCFormat the data disk #
As stated before, we are not using ZFS as a filesystem inside the VM. Instead, we are using ZFS to back a block device (our data disk) and, inside the VM, we will format it using XFS.
Furthermore, if you create a partition inside the VM, like most OS installers do, then resizing later will still involve partition math (e.g., using parted, fdisk, or sfdisk to adjust size). If, instead, you use the whole device directly (i.e., format /dev/sdc without a partition table), then resizing becomes simpler.
Therefore, inside the VM, all that is left is to format the data disk. As the root user, install the required packages:
apt-get install --yes xfsprogsThen, identify the disk using the lsblk command (e.g., sdc) , then format it:
mkfs.xfs -b size=4096 /dev/sdcUnfortunately, when using Debian 12 Bookworm, we cannot align the block size of our XFS filesystem (4K) to the volblocksize of our ZVOL (8K) because the page size of the kernel is 4K (standard for most x86_64 Linux system), and XFS requires the block size to be less or equal than the page size.
Although we could install kernel 6.12 from Debian Backports, which includes support for Large Block Sizes (LBS), we would still be lacking a recent-enough version of xfsprogs (at least 6.5) that understands LBS filesystems, and this package has not been backported. Our only option is to upgrade to Debian 13.
However, even if our XFS block size is 4K, the ZVOL will still aggregate writes into 8K blocks on disk, which can improve performance on spinning disks and reduce fragmentation.
Aligning the block size of XFS with the block size of the ZVOL is always beneficial, no matter what value of
ashiftyour ZFS storage pool has.
Therefore, let’s wrap this up by creating the mount point, gettting the UUID of the new disk with the blkid command, and configuring the /etc/fstab file so it is automatically mounted at boot:
mkdir /srv/nfs
blkid /dev/sdc
echo 'UUID=333e6175[..] /srv/nfs xfs noatime 0 2' >> /etc/fstab
systemctl daemon-reload
mount /srv/nfs
If you created the virtual disk using the terminal, then you can take advantage of the serial option to skip the blkid command and simplify the /etc/fstab entry:
# /etc/fstab
/dev/disk/by-id/scsi-0QEMU_QEMU_HARDDISK_data /srv/nfs xfs noatime 0 2
You may notice that the output of the blkid /dev/sdc command includes BLOCK_SIZE="512", or some other value different from the one you used when formatting the disk. This is because ZVOLs abstract physical blocks and present virtual 512-byte sectors to guests. This is hardcoded in ZFS and not configurable via volblocksize. Moreover, ashift and volblocksize optimise storage efficiency, but do not affect the sector size exposed to the guest.
In the future, use
xfs_info /dev/sdcto check the arguments used when formatting.
To get better performance and control, we are not using the discard mount option. Instead, we will run fstrim periodically:
systemctl enable fstrim.timerNFS server #
Install the required packages:
apt-get install --yes nfs-kernel-serverNFS-mounted directories are not part of the system on which they are mounted. So, by default, the NFS server refuses to perform operations that require superuser privileges (e.g., reassign ownership).
NFS can be configured to allow trusted users on the client system to perform superuser tasks, but this introduces an element of risk, as such a user could gain root access to the entire host system.
In our example, we will create a general purpose NFS mount that uses default NFS behaviour to store files that were uploaded using a content management system. Since NFS operates using the nobody:nogroup credentials, we will assign those to the subdirectory.
mkdir --parents /srv/nfs/myapp
chown nobody:nogroup /srv/nfs/myapp
NFS will translate any root operations on the client to the nobody:nogroup credentials as a security measure. Therefore, we need to change the directory ownership to match those credentials.
Support for NFSv4 was standarized in 2003, so we will assume that all clients, as well as the server, will be using this version of the protocol. Certainly, nfs-kernel-server 2.6.2 on Debian 12 Bookworm does support NFSv4.
NFSv4 exports typically under a common pseudo-root, /srv/nfs in our case. The host exports such top-level directory with fsid=0, and clients mount subpaths, e.g., /myapp.
We are now ready to export the share by editing the /etc/exports file:
/srv/nfs \
    myapp1.localdomain.com(rw,async,no_subtree_check,root_squash,fsid=0) \
    myapp1.localdomain.com(rw,async,no_subtree_check,root_squash,fsid=0)

/srv/nfs/myapp \
    myapp1.localdomain.com(rw,async,no_subtree_check,root_squash) \
    myapp2.localdomain.com(rw,async,no_subtree_check,root_squash)
Let us review each of the options:
rw: Gives the client permission to read from and write to the volume.async: Instructs NFS to reply to write requests from clients as soon as the data is received, without waiting for the data to be written to disk. This leads to better performance but there is a trade-off with data integrity.no_subtree_check: Prevents the process where, for every request, the host must check whether a given file is actually still available in the exported tree, e.g., when a client requests renaming a file that is still open by another client.root_squash: Map client’srootuser tonobody, for security (default behaviour).fsid=0: Defines the NFSv4 root export.
If your workload is not sensitive to latency, it is recommended to use the default sync mode instead of async, so that NFS is forced to to write changes to disk before replying. This reduces the speed of operations but results in a more stable and consistent interaction.
The
fsid=0option is not required for root access, but to define the NFSv4 root export.
NFS takes the seach domain of its host as its main domain. In our case, that is correct but, if you want to be explicit about it, edit the /etc/idmapd.conf file:
[General]
Domain = localdomain.com
And restart the appropriate daemon:
systemctl restart nfs-idmapdExport the changes and, optionally, confirm the exported configuration:
exportfs -ra
exportfs -v
Finally, verify the setup is working fine:
showmount -e nfs1.localdomain.comDepending on the expected workload, you may want to increase the number of NFS threads (nfsd) started by the kernel:
echo "RPCNFSDCOUNT=32" >> /etc/default/nfs-kernel-serverAnd restart the appropriate daemon:
systemctl restart nfs-serverIncreasing this number can improve performance, especially under heavy load, by allowing the server to handle more concurrent NFS requests. However, excessive threads can introduce overhead and potentially lead to performance degradation.
Firewall #
Finally, we also need to adjust the firewall rules on the VM. At the moment you should already have aliases for both the client and the host, created via the Datacenter > Firewall > Alias menu option.
# /etc/pve/firewall/cluster.fw

[ALIASES]

ipv4_private_ansible1 192.168.0.1 # Ansible Controller
ipv4_private_nfs1 192.168.0.4 # NFS: Staging
ipv4_private_myapp1 192.168.0.5 # My app: Staging
ipv4_private_myapp2 1291.68.0.6 # My app: Staging
And you should probably have an IP set for the two LXC running your app:
# /etc/pve/firewall/cluster.fw

[IPSET private_myapp_staging] # My App guests

ipv4_private_myapp1
ipv4_private_myapp2
Therefore, you would create a security group for the NFS server host:
# /etc/pve/firewall/cluster.fw

[group nfs_staging] # Default rules for NFS servers

IN ACCEPT -source +private_myapp_staging -p udp -dport 2049 -log nolog # Allow NFS traffic
IN ACCEPT -source +private_myapp_staging -p tcp -dport 2049 -log nolog # Allow NFS traffic
And, finally, add the security group to the nfs1 guest:
# /etc/pve/firewall/<VMID>.fw

[RULES]
GROUP nfs_staging -i net0 # Allow access to NFS from guests
NFS client #
To access an NFS share from the client, we first need to provide ourselves with the essential userspace tools and kernel support modules needed to mount NFS shares using the standard mount command. Beyond installation, proper user and group ID alignment is important in order to preserve file ownership and permissions.
Finally, we need to configure our /etc/fstab with the appropriate options to achieve persistent mounts across reboots.
In a VM #
Support for NFS at the client side requires the installation of the nfs-common package. Let’s get that out of the way:
apt-get install --yes nfs-commonLet’s asume that our application myapp is run by the user myappuser, that belongs to the group myappgroup. Therefore, such user requires access to the files in the shared volume. Let’s create the mount point on the guest where NFS will act as client:
mkdir /mnt/files
chown myappuser:myappgroup /mnt/files
Then we can manually test that we can reach the NFS export:
mount --types nfs4 nfs1.localdomain.com:/myapp /mnt/files
umount /mnt/files
For this to work, the myappuser user and the myappgroup have to exist on both server and client, with matching UID and GID, respectively.
In our case, running id myappuser in our client tells us that both the user and the group have id 1001
uid=1001(myappuser) gid=1001(myappgroup) groups=1001(myappgroup),117(ssl-cert)So we need to create the same user and group in the nfs1 guest, where the NFS server runs:
groupadd --gid 1001 myappgroup
useradd --uid 1001 --gid 1001 --no-create-home --shell /bin/false myappuser
If we already have files in the shared volume /srv/nfs/myapp, we will need to recursively reassign ownership:
chown --recursive myappuser:myappgroup /srv/nfs/myappNow file ownership will behave correctly across the mount. No need to pass any extra options at mount time.
In order to have the remote volume mounted automatically upon reboot, we need to add the appropriate entry in the /etc/fstab:
# /etc/fstab. Static file system information
#
nfs1.localdomain.com:/myapp /mnt/files nfs4 auto,rw,suid,nouser,async,_netdev,nofail,noatime,nodiratime,nolock,rsize=65536,wsize=65536 0 0
Explanation of options:
nfs4: Use NFS version 4.auto: Allows automatic mounting at boot.rw: Mount read-write.nosuid: Disable SUID/SGID bits.nouser: Only root can mountasync: Use asynchronous I/O_netdev: Ensures mount happens after the network is up.nofail: Allows the system to boot even if the NFS mount fails.noatime: Disables updates to access timestamps on files.nodiratime: Reduces metadata writes when directories are read or traversed.nolock: Disable NFS file locking (avoids needingrpc.statdon the client side), unless your application relies on file locking internally, which is uncommon for file-based uploads like images.rsize=65536: Read buffer size, or the maximum number of bytes the client can read from the server in a single request.wsize=65536: Write buffer size, or the maximum number of bytes the client can send to the server in a single write request.
Regarding rsize and wsize, the larger the size, the fewer RPC calls for large sequential reads or writes, thus better throughput. For small random writes, this matters less. 65536 bytes equals 64 kB, which is usually the maximum supported by most modern NFS servers and clients.
Also note that we are not using the defaults option, as it includes the dev, suid and exec options that do not apply to our use case:
suid: Allow programs to run with set-user-identifier (SUID/SGID) bits.dev: Interpret device special files on the filesystem.exec: Allow execution of binaries.
We do not need to specify user or group, as ownership will work based on UID/GID.
Regarding the trailing zeros in our configuration file, respectively:
dumptells thedumpbackup utility whether to back up this filesystem.fs_passnocontrols whetherfsckshould check the filesystem on boot.
For network filesystems, both options are left disabled.
You are now ready to mount the volume with the options we just configured:
mount /mnt/filesIn an LXC #
When the NFS client is an unprivileged LXC, direct NFS mounting is not possible because AppArmor does not allow it. In such scenario, an alternative approach would be to mount the share on the Proxmox host first, then bind it to the container.
Aside from security risks on our multi-tenant environment, this setup reduces isolation, requires host-level privileges and increases cluster complexity (all nodes mount the same NFS paths so that guests can be migrated).
However, if we were to configure the LXC as privileged, then we could reproduce the steps performed on the client VM. Trading security for convenience, privileged LXCs are less isolated than unprivileged containers, therefore a host kernel issue or crash would affect all containers and NFS mounts inside the LXC. Moreover, NFS mounts would break during live migration or backup, or prevent these tasks from completing successfully.
All in all, when using LXC the recommended way to store files would be an S3-compatible object storage.
Multiple shares #
Eventually, you may need the NFS server to share multiple volumes, perhaps for different applications in a platform. You could have shared volumes among different applications, and also different shares for the same set of applications.
For example, you could create the following directory structure in the VM hosting our NFS server:
# tree -L 1 /srv/nfs
/srv/nfs/
├── allapps
│   └── files
├── newapp
│   ├── media
│   ├── static
│   └── tmp
└── oldapp
    ├── docs
    └── tmp
Unfortunately, the NFS exports file (/etc/exports) does not support variables, macros, includes, or preprocessor-like syntax such as defining common options in one place and reusing them. It is a flat file where every line must be fully expanded and interpreted literally by the exportfs system.
Therefore, in terms of keeping the /etc/exports file more readable, we can only go so far as to:
- Using line breaks and indentation clearly.
- Avoiding redundant options when possible.
- Grouping hosts when they all share the same options.
Given these premises, in order to match the structure above, we would modify the /etc/exports file in our NFS server to this:
# Root of export tree
/srv/nfs \
    oldapp1.localdomain.com(rw,async,no_subtree_check,root_squash,fsid=0) \
    oldapp2.localdomain.com(rw,async,no_subtree_check,root_squash,fsid=0) \
    newapp1.localdomain.com(rw,async,no_subtree_check,root_squash,fsid=0) \
    newapp2.localdomain.com(rw,async,no_subtree_check,root_squash,fsid=0)

# All apps
/srv/nfs/allapps/files \
    oldapp1.localdomain.com(rw,async,no_subtree_check,root_squash) \
    oldapp2.localdomain.com(rw,async,no_subtree_check,root_squash) \
    newapp1.localdomain.com(rw,async,no_subtree_check,root_squash) \
    newapp2.localdomain.com(rw,async,no_subtree_check,root_squash)

# New app
/srv/nfs/newapp/media \
    newapp1.localdomain.com(rw,async,no_subtree_check,root_squash) \
    newapp2.localdomain.com(rw,async,no_subtree_check,root_squash)

/srv/nfs/newapp/static \
    newapp1.localdomain.com(rw,async,no_subtree_check,root_squash) \
    newapp2.localdomain.com(rw,async,no_subtree_check,root_squash)

/srv/nfs/newapp/tmp \
    newapp1.localdomain.com(rw,sync,no_subtree_check,root_squash) \
    newapp2.localdomain.com(rw,sync,no_subtree_check,root_squash)

# Old app
/srv/nfs/oldapp/docss \
    oldapp1.localdomain.com(rw,async,no_subtree_check,root_squash) \
    oldapp2.localdomain.com(rw,async,no_subtree_check,root_squash)

/srv/nfs/oldapp/tmp \
    oldapp1.localdomain.com(rw,sync,no_subtree_check,root_squash) \
    oldapp2.localdomain.com(rw,sync,no_subtree_check,root_squash)
At each of our client VMs, we would create the necessary mount points using mkdir and set the correct permissions using chown.
# New app guest
# tree -L 1 /mnt
/mnt
├── files
├── media
├── static
└── tmp

# Old app guest
# tree -L 1 /mnt
/mnt
├── docs
├── files
└── tmp
Finally, when adapting the /etc/fstab configuration files in the client VMs, aside from getting the paths right, make sure you mount leaf nodes only:
# New app guest
# /etc/fstab
nfs1.andromedant.com:/allapps/files /mnt/files  nfs4 auto,rw,suid,nouser,async,[..] 0 0
nfs1.andromedant.com:/newapp/media  /mnt/media  nfs4 auto,rw,suid,nouser,async,[..] 0 0
nfs1.andromedant.com:/newapp/static /mnt/static nfs4 auto,rw,suid,nouser,async,[..] 0 0
nfs1.andromedant.com:/newapp/tmp    /mnt/tmp    nfs4 auto,rw,suid,nouser,sync,[..]  0 0
All client VMs would follow a similar pattern.
As an example, in this scenario we are also taking the chance to enable synchronous writes to our tmp shares because we do not want any of our consumers taking jobs from some work queue and attempting to read data that has not yet been flushed to disk.
Bulk load of files #
Our NFS server is ready, and so are our NFS clients. We now need to copy our existing files from their previous location to their new location in the shared volumes.
Using Rsync to do this would seem like the more sensible way to do this initial bulk transfer. During a maintenance window, we would execute the rsync command at the VMs running our old application to send the files to the mount points, then switch the paths. However, using Rsync over NFS is, probably, the least efficient way to do it due to the following reasons:
-
Metadata overhead. NFS requires a separate network round-trip for every file operation (
stat,open,read,close). For small files, this creates massive overhead. For example, synchronising 10,000 small files would require 40,000+ network requests. -
Lack of real parallelism. NFS operations are sequential by default. Rsync processes files one-by-one, amplifying latency.
-
Protocol limitations. Although NFSv4 was a huge improvement over NFSv3 in terms of compound operations (multiple actions in one request), it is still less efficient than native protocols like SSH.
-
Write barriers. By default, NFS enforces strict write ordering (sync writes), slowing small file operations. We did set up our shares using
async, so this would be less of a problem for us.
As a reference, here you have an estimation for 1 GB of 10 kB files:
| Method | Time | Network requests |
|---|---|---|
| Rsync | 8m 22s | ~120,000 |
| Rsync (–inplace) | 4m 15s | ~80,000 |
| Tar over SSH | 0m 48s | 1 |
| Parallel Rsync (16j) | 1m 12s | 16,000 |
Moreover, depending on the size of your archive, you want to spread this operation into several runs, using whatever criteria allows you to do one chunk at a time (e.g., by subdirectory).
Using Tar may be a reasonable option when piping the contents of the archive being built directly into SSH:
tar cf - /opt/oldapp/files | ssh nfs1.localdomain.com "tar xf - -C /srv/nfs/allapps/"Another reasonable option is to use Rsync over SSH, straight from the client VM to the server VM, not using the NFS mount point.
rsync --archive --no-owner --no-group --progress --delay-updates \
      --timeout=5 --delete --delete-delay \
      --rsh='/usr/bin/ssh -p 22 -o StrictHostKeyChecking=no' \
      /opt/oldapp/files/ nfs1.localdomain.com:/srv/nfs/allapps/files/
For maximum speed, SSH-based transfers will always outperform NFS for rsync workloads due to lower protocol overhead. However, for incremental updates after the initial synchronisation, using a tuned rsync over NFS will work well enough:
rsync --archive --no-owner --no-group --progress \
      --inplace --whole-file --recursive --links --delete \
      /opt/oldapp/files /mnt/files/
Key options:
--inplace: Writes directly to target files (reduces rename ops by avoiding temp-file renames).--whole-file: Sends whole files (disables delta-xfer to bypass slow rsync diffs).--no-owner --no-group: Do not attempt to change ownership (requires additional network requests).
You would have to manually reassign ownership of files afterwards on the guest running the NFS server, if necessary.
-
Managed via the
Datacenter > Permissions > Poolsmenu option. ↩︎ -
Default for newly created Linux VMs since Proxmox VE 7.3. Each disk will have its own VirtIO SCSI controller, and QEMU will handle the disks IO in a dedicated thread. ↩︎
-
There are three types of datasets in ZFS: a filesystem following POSIX rules, a volume (ZVOL) existing as a true block device under
/dev, and snapshots thereof. ↩︎