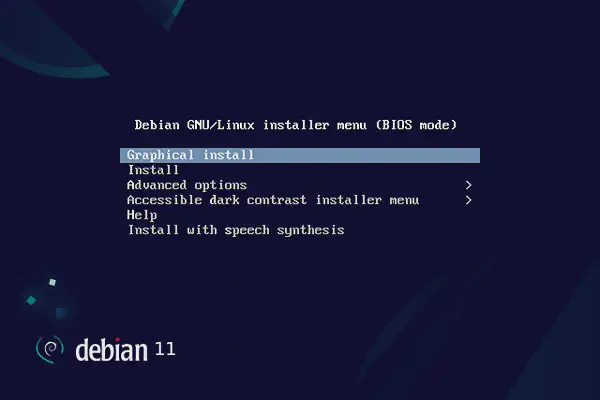
Proxmox Virtual Environment 7 will be installed on top of the existing Debian 11 Bullseye installation, which currently has a MAC address with one public IPv4 and one IPv6 address.
Beforehand #
Add the Proxmox APT repository to the system:
echo "deb http://download.proxmox.com/debian/pve bullseye pve-no-subscription" > /etc/apt/sources.list.d/pve-install-repo.list
wget http://download.proxmox.com/debian/proxmox-release-bullseye.gpg -O /etc/apt/trusted.gpg.d/proxmox-release-bullseye.gpg
Update the package index:
apt-get updateBetter safe than sorry, so manually install the ifupdown2 package before installing the Proxmox VE, as it is a tricky requirement located at the Proxmox APT mirror.
apt-get install ifupdown2
dpkg --purge ifupdown
systemctl enable networking.service
Proxmox packages #
Now you are ready to install the Proxmox VE packages.
apt-get install proxmox-ve open-iscsi zfsutils-linuxThe new Proxmox VE kernel should be automatically selected in the GRUB menu:
awk -F\' '/menuentry / {print $2}' /boot/grub/grub.cfgUnless you have a Proxmox subscription, remove the entreprise repository, which has just been added during the installation:
rm /etc/apt/sources.list.d/pve-enterprise.listThe enterprise repository is usually behind the community one, so run one last update of the list of packages and upgrade them to their latest versions:
apt-get update
apt-get dist-upgrade
Optionally, clean the downloaded packages cache:
apt-get cleanSince Proxmox includes its own firmware, installed packages that contain firmware should automatically have been removed when installing pve-firmware and pve-edk2-firmware, which are dependencies of proxmox-ve. Example of packages that should have been automatically removed are firmware-bnx2x, firmware-realtek and firmware-linux-free. You can check that using the following command:
dpkg --list | grep -e firmware-bnx2x -e firmware-realtek -e firmware-linux-freeAdditionally, you may also want to check that the package os-prober, an utility to detect other OSes on a set of drives, is not installed either:
dpkg --list | grep os-proberReboot:
rebootLog in again and, optionally, check that the kvm kernel module is loaded:
lsmod | grep kvmIf it is not loaded, you can load it manually. For Intel CPUs, you will need to load the kvm_intel module, and for AMD CPUs, the kvm_amd module. The following command will load the appropriate module for your CPU:
modprobe kvmOptionally, remove the stock Debian kernel, as it is no longer needed:
apt-get purge linux-image-amd64 'linux-image-5.10*'Nameservers #
Proxmox VE expects to manage the DNS and will not take its DNS settings from /etc/network/interfaces. Any package that auto-generates /etc/resolv.conf will cause the DNS to fail, so make sure that resolvconf and rdnssd are not installed:
dpkg --list | grep -e resolvconf -e rdnssdThe default Debian installation by Hetzner’s Installimage statically sets Hetzner’s nameservers in the /etc/resolv.conf file, so we do not need to change anything.
nameserver 185.12.64.1
nameserver 2a01:4ff:ff00::add:2
nameserver 185.12.64.2
nameserver 2a01:4ff:ff00::add:1
Network configuration #
Our network design using virtual switches will be done using a bridged mode due to the following advantages:
- The host is transparent and not part of the route.
- Guests can directly communicate with the gateway of the assigned IP address.
As per the Hetzner’s network configuration on Debian-based systems document, a point-to-point configuration needs to be used. This is because the main IP of the dedicated server is usually located in a /26 or /27 subnet and this mechanism prevents the accidental use of a foreign IP address (their infrastructure rejects any Ethernet packets that are not addressed to the gateway address).
There are two ways to set up the necessary bridges in each host:
- VLAN-aware bridges.
- Traditional bridges.
When using a VLAN-aware bridge:
- The host has just one bridge (
vmbr0), that is aware of all the configured VLANs via thevlan-awareandvlan-vidsoptions. - Each guest’s virtual network card is assigned to the host’s only bridge (
vmbr0). - Each guest’s virtual network card is assigned a VLAN tag, which is transparently supported by the host bridge.
- The host’s bridge does not check the packages travelling through it, as it is the kernel’s reponsibility (at the guest’s side) to add the proper VLAN tag to each package.
When using traditional bridges:
- The host has one VLAN interface and one bridge for each VLAN tag.
- Each guest’s virtual network card is assigned a specific bridge from the host, but no VLAN tag is associated.
- The VLAN tag is added by the bridge at the host (via sub-interface, e.g.,
eno1.4001), thus making sure that all traffic going through that bridge is properly tagged. - Human-readable, self-explanatory bridge names can help preventing misconfigurations (e.g.,
vmbr4002for the guests’ local network). - The management IP of the host remains on the physical interface (
eno1). - Future migrations between virtualisation platforms should be easier to automate.
| Component | Traditional bridges | VLAN-aware bridge |
|---|---|---|
| Bridges | Multiple (1 per VLAN) | Single bridge |
| VLAN handling | Host adds tags | Guests add tags |
| Guest config | No VLAN tags needed | VLAN tag required per guest |
| Host interfaces | Physical interface for management | VLAN sub-interface on bridge |
| Topology | Explicit separation | Consolidated through software |
| Debugging | Easier (named bridges) | Harder (shared bridge) |
Given the naming conventions for device names described in the Host System Administration: Network Configuration section of the Proxmox VE Administration Guide, we are going to use the following configuration in our single-NIC servers:
| Type | Device name | Used by | Type | Description |
|---|---|---|---|---|
| Ethernet device | eno1 |
The host | Public IP | Public IP address assigned to the server when ordered |
| Bridge | vmbr4001 |
Guests | Public subnet | Floating public subnet assigned to the vSwitch with id 4001 |
| Bridge | vmbr4002 |
Guests | Private subnet | Communication among guests through vSwitch with id 4002 |
| VLAN | eno1.4003 |
Hosts | Private subnet | Communication among nodes through vSwitch with id 4003 |
Guests will be having one or two virtual network devices:
eno1will be mandatory and will have an IP address of the private network192.168.0.0/16.eno2will be optional and will have an IP address of the public subnet assigned to the vSwitch with VLAN id4001.
Therefore, the following configuration, using traditional bridges, will be applied to the /etc/network/interfaces file on the host:
source /etc/network/interfaces.d/*

auto lo
iface lo inet loopback

# Physical interface (Hetzner requires point-to-point config)
auto eno1
iface eno1 inet static
    address v4.public.ip.addr
    netmask v4.public.ip.mask
    gateway v4.public.ip.gw
    pointopoint v4.public.ip.gw
    hwaddress aa:bb:cc:dd:ee:ff
# Proxmox host

iface eno1.4001 inet manual
    vlan-raw-device eno1
    mtu 1400

auto vmbr4001
iface vmbr4001 inet manual
    bridge-ports eno1.4001
    bridge-stp off
    bridge-fd 0
    mtu 1400
    bridge-disable-mac-learning 1
# Proxmox guests public network

iface eno1.4002 inet manual
    vlan-raw-device eno1
    mtu 1400

auto vmbr4002
iface vmbr4002 inet static
    bridge-ports eno1.4002
    bridge-stp off
    bridge-fd 0
    mtu 1400
# Proxmox guests private network 192.168.0.0/16

auto eno1.4003
iface eno1.4003 inet static
    address 10.0.0.1/24
    vlan-raw-device eno1
    mtu 1400
# Proxmox hosts private network 10.0.0.0/24
Some relevant notes about the configuration above:
- The
eno1interface is configured with a static IP address, which is the public IP address of the host. - The
eno1interface is configured with a point-to-point configuration and a specific MAC address, which is required by Hetzner’s network infrastructure. - We use a VLAN for the private LAN of the nodes instead of a bridge, which will make it not appear on the guests when these are being configured.
- We will use the default network interface
eno1instead of avmbr0, so that it cannot be selected on the guests when these are being configured.
We need to restart the networking service for the new configuration to take effect:
systemctl restart networkingFail2ban #
Fail2ban is a security tool written in Python that offers protection against so-called brute force attacks. The IP address of the user is blocked for a certain period of time after several incorrect passwords have been entered. This is to prevent the attacker from trying out a large password list in a short time.
We are going to use Fail2Ban to protect the SSH service as well as access to Proxmox’s web interface.
Install the fail2ban package and enable the service:
apt-get install fail2ban
systemctl enable fail2ban
Create a configuration file from one of the given templates:
cp --archive /etc/fail2ban/jail.conf /etc/fail2ban/jail.localEdit the /etc/fail2ban/jail.local file, make the following changes in the [sshd] section and add the [proxmox] section at the end of the file:
[sshd]
enabled = true
port = 2001

[proxmox]
enabled = true
port = 8006
filter = proxmox
logpath = %(syslog_daemon)s
maxretry = 3
bantime = 3600
Changing the default SSH port was done in the previous post of this series.
Note that syslog_daemon is defined in /etc/fail2ban/paths-debian.conf as an alias to /var/log/daemon.log.
Next, create the file /etc/fail2ban/filter.d/proxmox.conf with the following content:
[Definition]
failregex = pvedaemon\[.*authentication failure; rhost=<HOST> user=.* msg=.*
ignoreregex =
While Debian 11 Bullseye uses nftables by default, the kernel shipped with Proxmox 7 still uses iptables. Since Fail2ban uses iptables by default, we do not need to make any further changes.
Restart the service to apply the changes:
systemctl restart fail2banYou can use fail2ban-client to check the status of the jail:
fail2ban-client status proxmoxYou should see something like this:
Status for the jail: proxmox
|- Filter
|  |- Currently failed: 2
|  |- Total failed:     5
|  `- File list:        /var/log/daemon.log
`- Actions
   |- Currently banned: 0
   |- Total banned:     0
   `- Banned IP list:
You can use fail2ban-regex to test the filter:
fail2ban-regex /var/log/daemon.log /etc/fail2ban/filter.d/proxmox.confYou should see something like this:
Running tests
=============

Use   failregex filter file : proxmox, basedir: /etc/fail2ban
Use         log file : /var/log/daemon.log
Use         encoding : UTF-8


Results
=======

Failregex: 0 total

Ignoreregex: 0 total

Date template hits:
|- [# of hits] date format
|  [206] {^LN-BEG}(?:DAY )?MON Day %k:Minute:Second(?:\.Microseconds)?(?: ExYear)?
`-

Lines: 206 lines, 0 ignored, 0 matched, 206 missed
[processed in 0.01 sec]

Missed line(s): too many to print.  Use --print-all-missed to print all 206 lines
Root password #
Given that we will be using the root user credentials to access the web interface, first of all make sure that the user has a strong password via either the passwd or the pveum passwd root@pam command.
Proxmox VE employs a multi-master design, meaning each node operates independently with its own user accounts and permissions. The root user is the superuser on each node, and it is not shared across nodes. Therefore, you will set the root password on each node independently.
The root@pam realm refers to the local system user authentication on the specific Proxmox VE host. This is the default authentication method for Proxmox VE, and it allows you to manage local users and groups.


