Once we have our Proxmox cluster up and running, whether it has just one node or multiple nodes already, we will eventually have to go through the process of adding a new node to the cluster.
Adding a node to a cluster is a straightforward process, but it requires careful attention to detail to ensure that everything works smoothly.
Planning #
It is imperative that we follow a set of well-defined steps to avoid human errors. Any of the existing nodes can be used as basis to add new nodes, but we will always use the first node as the reference point.
The steps to follow are:
- Add the server to the virtual switches.
- Install and configure the operating system.
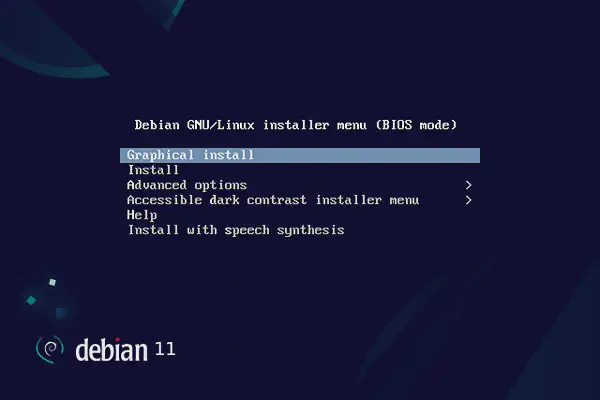
- Install the Proxmox packages.
- Edit the
/etc/hostsfile on all nodes, existing and new, so that there is an entry for each node, including the new node being added. - Test connectivity among nodes using
ping, including the new server, on the10.0.0.0/24network. - If using Cloudflare DNS to issue new Let’s Encrypt certificates, add the public IP address of the new server to the API Token on Cloudflare.
- Disable 2FA in the existing cluster.
- Add the server to the cluster.
- Edit the Hetzner firewall to remove temporary access to port 22 on the public IP address.
- Optionally, edit the Proxmox firewall on the newly added node to allow SSH access.
- Using one of the previously existing cluster nodes, issue a Let’s Encrypt certificate for the newly added node
- Re-enable 2FA for the cluster.
Most of these steps have already been covered in previous posts. Thus, in this article we will focus on the new ones only.
Two-Factor Authentication #
Before adding the new node, we need to disable 2FA in the existing cluster. This can be done by navigating to Datacenter > Permissions > Two Factor, editing the root@pam user account and unchecking the Enabled option. To re-enable it later, we would use the same interface.
Alternatively, we can do it from the terminal:
mv /etc/pve/priv/tfa.cfg /etc/pve/priv/tfa.cfg.bakTo re-enable it later, we can move the file back:
mv /etc/pve/priv/tfa.cfg.bak /etc/pve/priv/tfa.cfgThe
pveumcommand does not allow disabling 2FA, only deleting it.
Hosts mapping #
Regarding the need to edit the /etc/hosts file on all nodes, this is crucial to ensure that all nodes can resolve each other’s hostnames correctly. If you do not want to use hostnames when managing your cluster, or to have IP addresses resolving to hostnames, then this mapping becomes just convenient.
Anyhow, this can be done either using the System > Hosts menu entry of the WebGUI in each node, or by editing the /etc/hosts file through the terminal.
Because the /etc/hosts file is not inside /etc/pve, it is not automatically replicated across the cluster, so we need to manually ensure that all nodes have the same entries (the same /etc/hosts file, actually).
Adding the server #
Visit the Proxmox WebGUI of the first node and navigate to Datacenter: Cluster. Use the Join information button to get the necessary information for the new node being added.
- IP address:
10.0.0.1 - Fingerprint:
CD:5B:D4: [..] - Join information:
eyJpcEFk [..]
Use the
Copy informationbutton to ease the process.
Open new browser tabs for each of the other servers (e.g., https://proxmox2.publicdomain.com:8006/), navigate to Datacenter > Cluster and click the Join cluster button. Paste the just-copied information and insert these values:
- Password:
<the root user password of the first node> - Cluster network: choose the node private address
10.0.0.1from the list
In the broswer tab of the first node we will see the node being added to the existing cluster. In the browser tab of the server being added we will be losing connection. If we refresh the page, we will be getting a security warning due to the change in the certificate. However, we can just close it and continue the configuration from the first node.
We will not lose connection via SSH to the newly-added node since we have an existing rule at the datacenter level to alllow TCP connections to the port range 2001 to 2010.
You can check the nodes of a cluster from the terminal at any moment by running the following command:
pvecm nodesCertificate issuance #
Issuing a Let’s Encrypt certificate for the newly added node is similar to the process we followed when creating the cluster. The only difference is that we will be doing it from the first node of the cluster. As stated before, it could be done from any of the existing nodes, but we will use the first one as the reference point.
Using the WebGUI of the first node, go to the System > Certificates menu option of the newly added node and, in the ACME section, use the Add button to add the certificate request data:
- Challenge type:
DNSorHTTP - Plug-in:
cloudflare(if you selected the DNS challenge type) - Domain:
proxmox2.publicdomain.com
Still in the ACME section of the screen, choose the account by clicking the Edit button next to the Using account label, select the account created before (e.g., Calabruix) and click Apply. Finally, click the Order Certificates Now button.
The process will place the order, which will consist of:
- Validating the ownership of the domain.
- Sending the CSR (certificate request).
- Waiting for the certificate to be issued.
- Installing the certificate and restarting the PVE Proxy.
In a new browser tab or window, load the WebGUI of the new node and enter the credentials again. No error regarding an invalid certificate should appear.


